-
Transfiguration Class

I learned about a fantastic Harry Potter Escape Room idea on EPBOT.com. The author described affixing instructions for to the bottom of a hollow box, placing iron shavings that looked like ash over the instructions, then placing glass on top, so that when the student tapped their wand (which had a magnet on it) on the “ash” it would reveal the hidden message.
Brilliant, right? A wand that actually works! So cool!
I decided that I had to use this idea!
But, since I wanted my students to be going to various classes, I felt I had to figure out how this ash trick could fit into a Hogwart’s class. I realized that they could transform ash into…something, and the class could be transfiguration! Perfect!
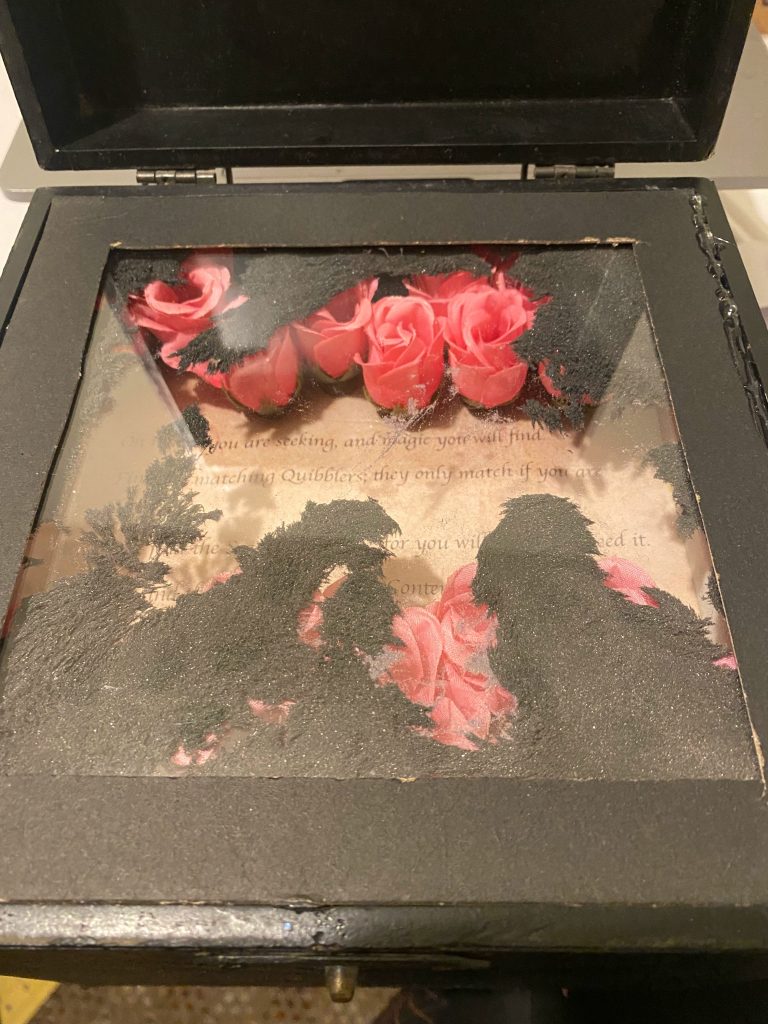
I decided they’d transform the ash into roses. This added a little bit of complexity to my ash box, because I had to write the hidden message on the bottom, glue roses around the message, add a layer of glass, put the iron shavings on that glass, and then put a layer of glass on top.
I thought it would work!
It turns out, it was more complicated than I thought.
First of all, since I had two layers of glass, I couldn’t really test my design until the first layer of glass was glued down. This limited my ability to test and re-design. I was able to test things with the top layer of glass not glued yet, and found it to be…difficult. If I put too little iron shavings, they moved easily, but I couldn’t hide my message. If I put too much iron shavings, I could hide the message, but the ash wouldn’t easily move. I ended up coming up with a few solutions that make my ash box usable, but certainly not astounding.
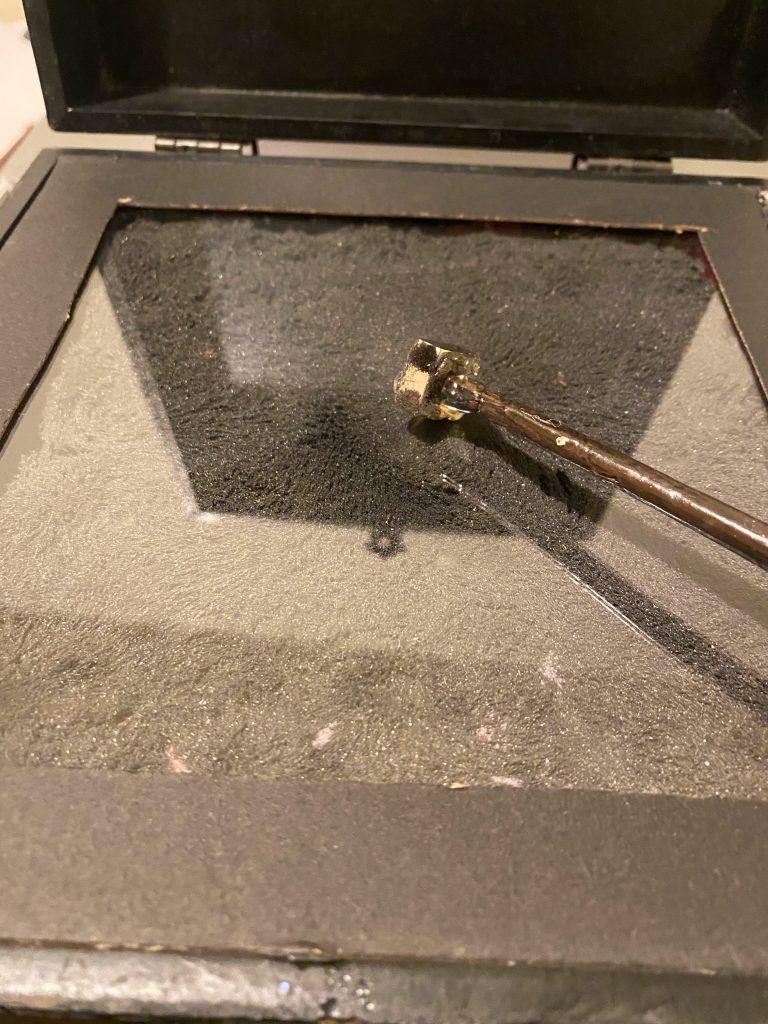
First, I added a border around the edge of my box, so to cover up the message, I could have the shavings in the center, and the border blocking the view from the outside. It wasn’t really the look I craved, but it was necessary. With the border in place, I could put a good amount of ash in the center which could then be moved to the edges (under the border) to reveal the message.
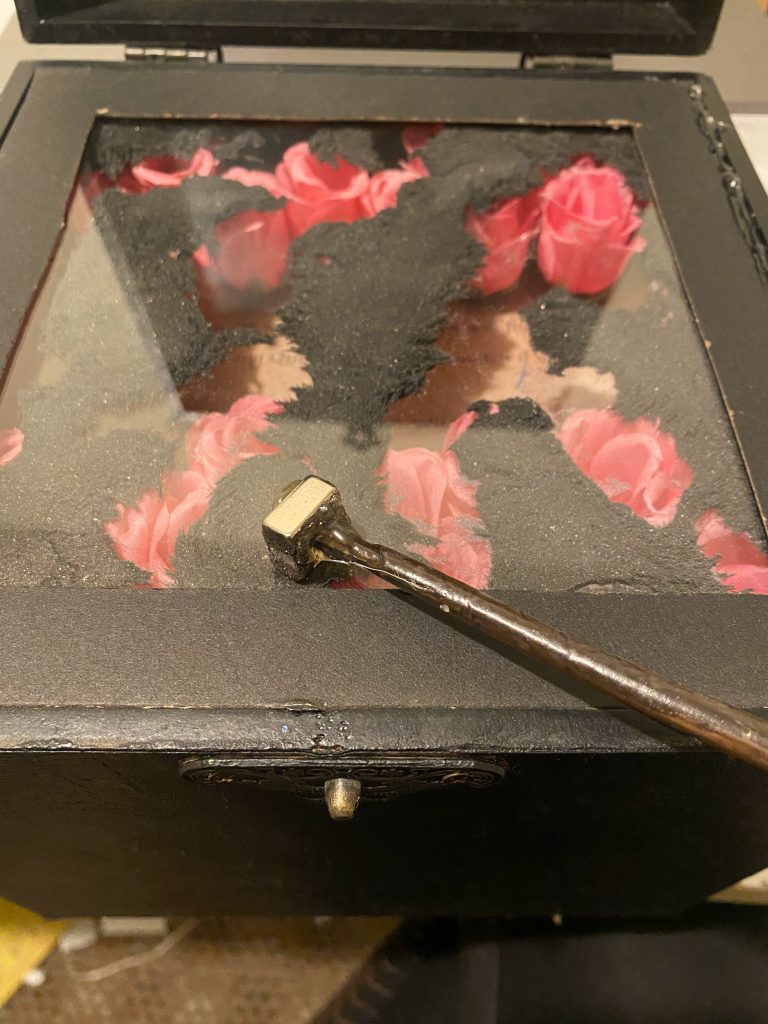
Second, I got a crazy powerful magnet. I was trying to use a itty bitty magnet that would blend into the wand. It just didn’t move the ash all that well. I ended up with a square magnet that is probably .5 inch x .5 inch or slightly larger, and weighs down the wand. Oh well.
Finally, the “tap” instructions just didn’t work for my project. My students are instructed to tap their wand in the center, and sweep it to the edges.
I was SOOOO excited for the ash box, and we’ll see on party day how the kids respond, but it definitely isn’t quite as smooth as I’d prefer!
-
The Quibbler Task

I really wanted to somehow incorporate Quibblers into my Harry Potter escape room.
Why? Mostly because Luna Lovegood is hilarious, and I thought it would be fun.
I was STOKED when I found that the Wizardry Workshop had free printable Quibblers (multiple editions available)!
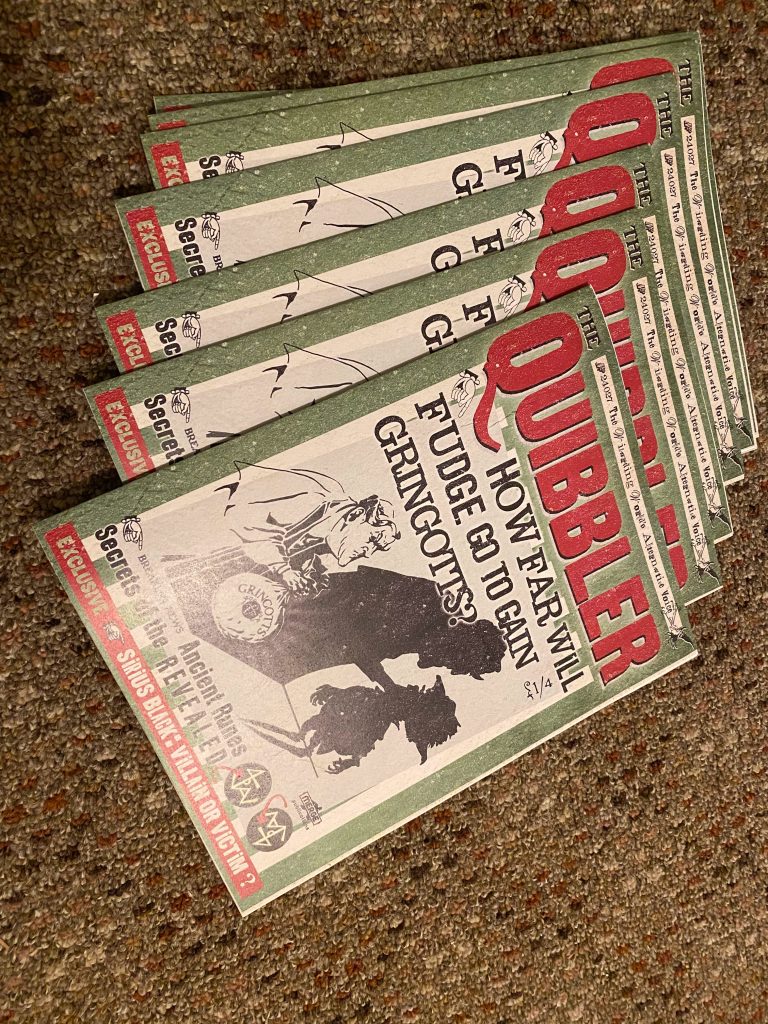
I downloaded a copy, and got to work in Canva making it into an escape room task.
I added numbers along the X axis and along the Y axis on the Contents page. I then changed three elements on the contents page. When the students find the swaps, they’ll line up where the changes were on the X axis and Y axis on a secret keycode that I printed on another page of the Quibbler. Doing so will give them a word that they will need.
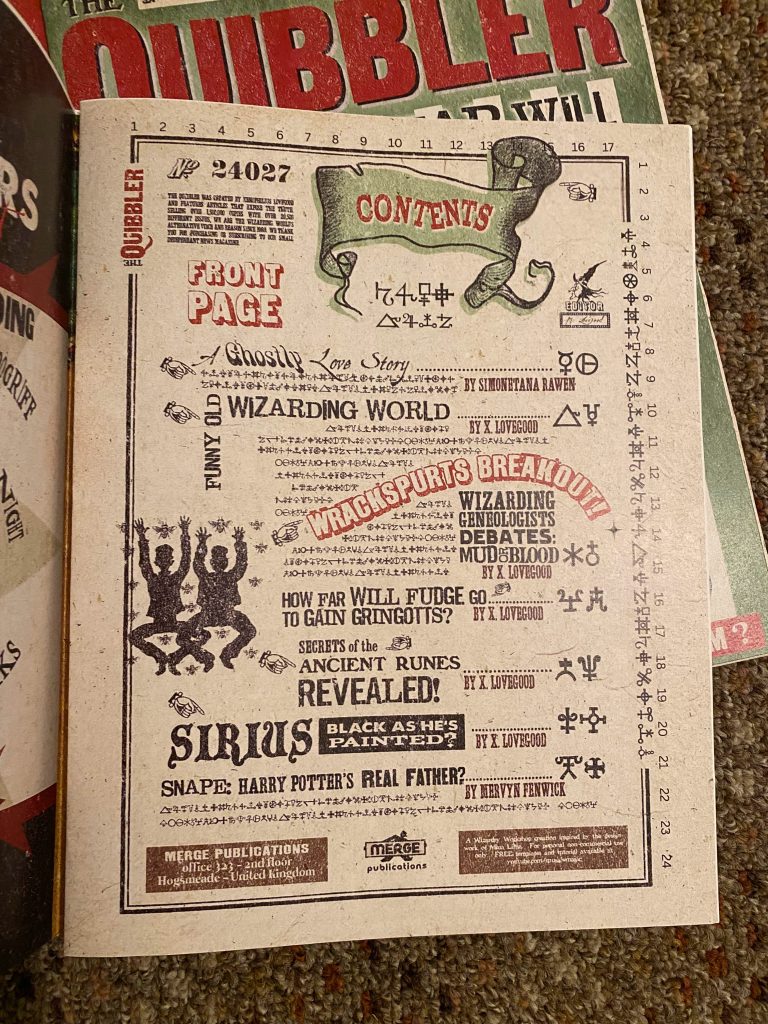
I printed up two copies of the quibbler for each house – one original with just the addition of the numbers along the side of the Contents page, and one with the changed elements and the secret keycode. That way, all the students can work at the same time, just having to share with their housemate.
I think it’s a pretty fun task!
-
Potions Bottles

I wrote pretty in-depth about the Potions Task that I have planned for my daughter’s Harry Potter escape room, but the decided that I had to add more.
I ended that post talking about how the originator of that potions task had a list of spells, and when the participants completed the potions task, they had to match the color of the potion they created to a the color of the spell on a poster to get a passcode that they needed. I wrote about how this was disturbing to me, because obviously in POTIONS class the students should be creating a POTION, not a SPELL. I decided to modify the poster to fit this more accurate story.
And then…I realized…”shouldn’t I just make POTIONS they they can match their brewed potion to?”
Yes.
Yes, I should.
What I really wanted to do was create fun potions that matched the descriptors of various potions in the Harry Potter books.
The problem?
Honestly, the descriptions of the potions in the books are quite difficult to create. Descriptors in the books include things like, “a mother of pearl sheen with spiraling, curling steam,” or “a thick sludgelike potion that bubbles slowly…”
Additionally, I needed my potions to be colors one could imagine coming from the liquids used in the task and I wanted to avoid any colors that could possibly be confused with the pink they were to match to (so no reds or oranges). All this meant that I couldn’t go too wild with color choices or additives.
I had to make my potions a bit different that what was described in the books or depicted in the movies.
Buuuuut…I do like how they turned out.
I created:
Skele-gro
Wolfsbane
Beguiling Potion
Exstimulo Potion
Polyjuice Potion
I tried to match the colors to the book descriptors when I could, but most of my potions do NOT match their descriptions in the book
The Skele-gro I created is closest to it’s book description (a bright yellow thick liquid), but I had to not paint the bottle opaque white as seen in the movie, because I needed my escape room participants to be able to see this bright yellow thick liquid. Therefore, I just painted the top of the bottle, and left the bottom transparent. The Skele-gro bottle was made with a used glass bottle painted white and topped with pieces of a plastic skeleton I bought. I am pleased with how it turned out!
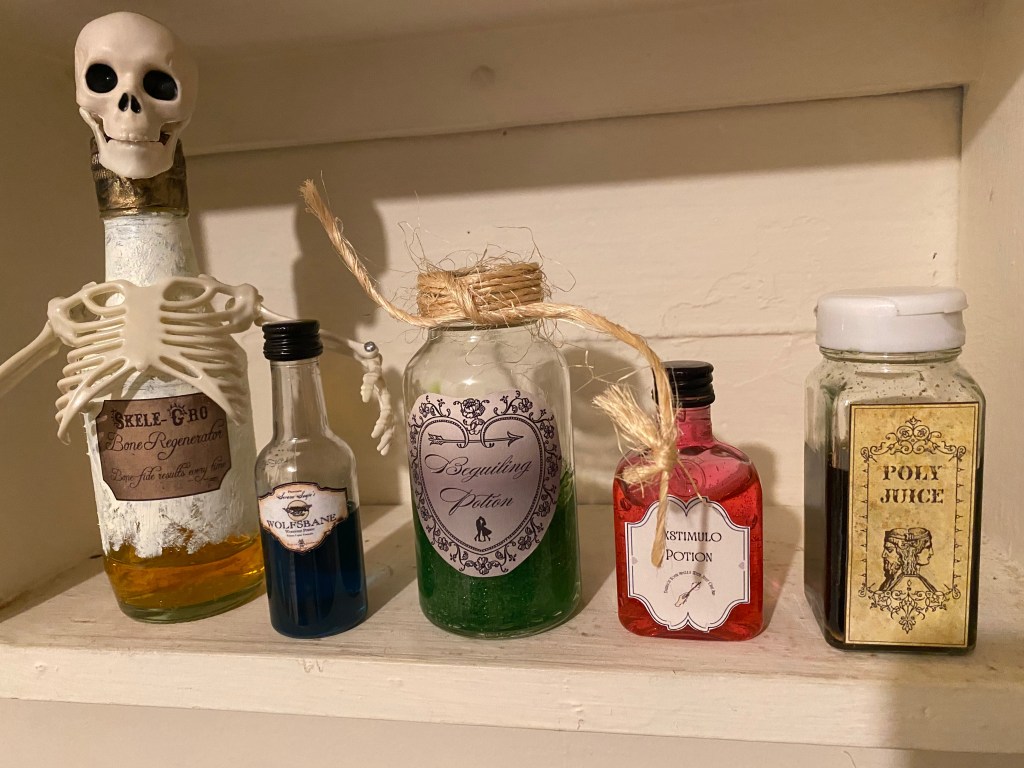
The potions themselves were all made with hair gel or rubbing alcohol mixed with food coloring, paint, and/or glitter.
Three of the potion labels were found free online, and I created two on Canva.
I am pleased with how the potions turned out! I think these little bottles will really elevate the Potions task and make the experience that much more magical!
-
Who is Escaping?

I’m not actually planning to lock children up in my house, so I had to get a little creative when it came to who is escaping at L’s Harry Potter Escape Room Birthday Party.
Often when people do at-home escape rooms, the escapees unlock a treasure or treats. I also read about one in which the players had to find an antidote for some potion someone had ingested, which was kind of a cute idea.
But…I came up with something I think is super fun and super cute.
The storyline of my escape room is this: Argus Filch was upset that students’ pets were bothering Mrs Norris (his cat), so he kidnapped all the pets. To get their pets back, the students must prove that they are responsible pet owners (whose pets would never bother Mrs Norris) by completing a series of tests and tasks.
I thought it was a super fun and logical storyline for a Harry Potter Escape Room. (It also kinda lines up with the Chamber of Secrets, right?)
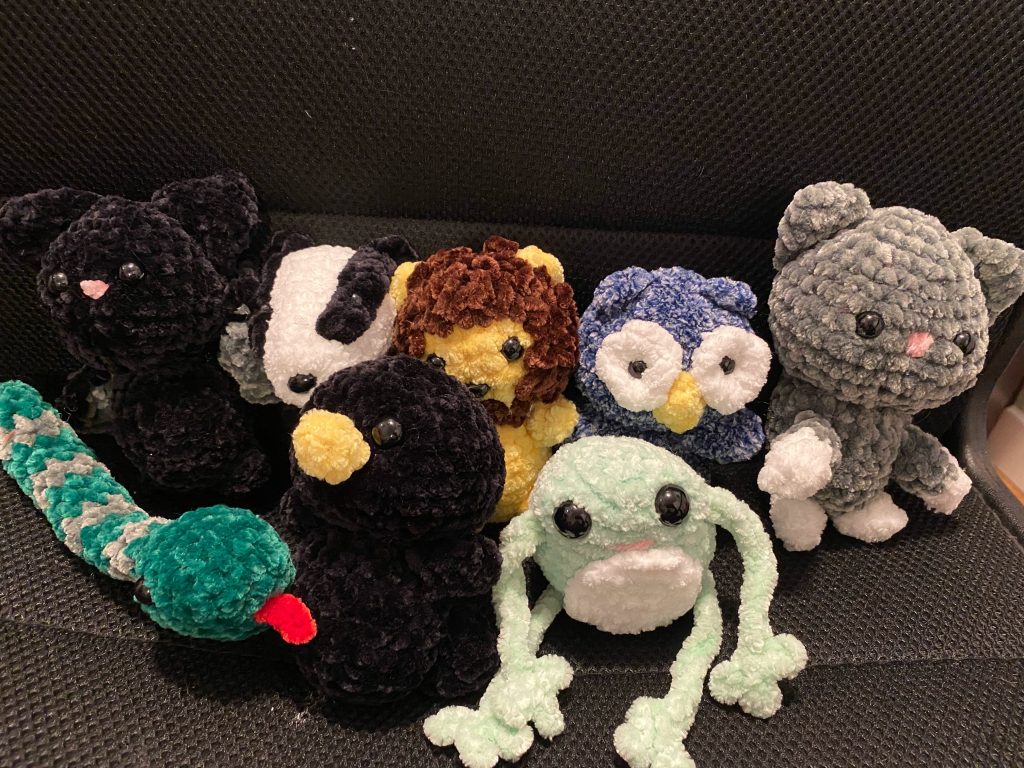
There will be 8 students total at this escape room, so I crocheted up 8 little amigurumi creatures that will be locked up and which the students will rescue if they complete all the tasks in the escape room.
With 8 students, it probably would have made sense to crochet two each of the known animals that Hogwarts students keep as pets: owls, rats, cats, and toads. Buuuut when I bought pattern instructions that included a badger and a lion and a raven, I just…I decided that I’d do the classic pets + one each of the house animals. Oh. But then the pattern I bought had the cutest bat, so I decided to forgo the rat and make a bat instead. Whatever. These are the Hogwarts students’ pets! It’s fine, it’s all fine.
Since the students will be sorted into houses, I do have plans for which pets go to each house. Slytherin students will have a snake and a bat. Ravenclaw will have a raven and a (wise old) owl. Hufflepuff will have a badger and a cat. Finally, Gryffindor will have a lion and a Toad (representing Trevor).
So here are the little cuties who will be looking forward to being rescued and adopted:
-
Making Whimsical Boxes

So…since our escape room must take place in our modest home, and we don’t really have a ton of doors or cabinets to lock, our escape room needs a TON of boxes.
I got most of the boxes for $2 at the thrift store. Some boxes were just wooden and therefore fine to keep as they were. But some had odd decorations on them, so I had to add a little theming and whimsy to them.
I present: My magical whimsical Harry Potter escape room boxes!
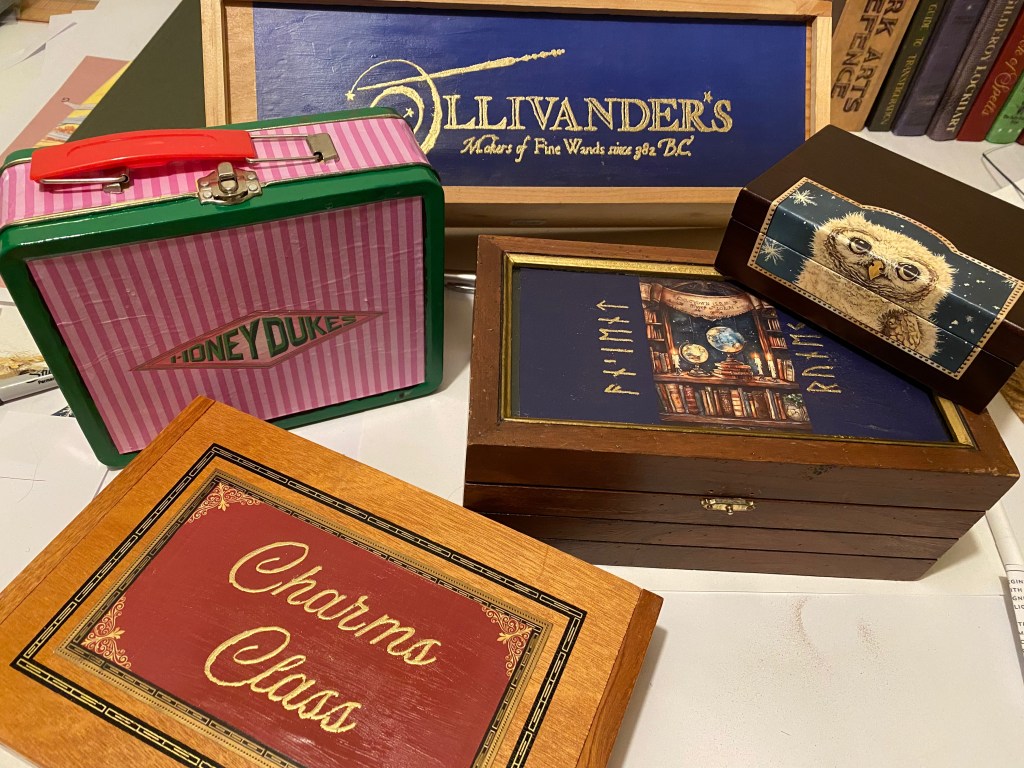
They were pretty much made with my Canva skills, Mod Podge, and embossing powder. Some also used logos I found for free on the internet, and some included images I bought from BowArts on Etsy.
Unexpectedly, my modpodge skills got worse as time went on. I’d say the most flawless application is the little owlery box, which was the first box I made, and one of the worse was the Honeydukes lunch box, which was one of the last that I made.
Either way, I am generally pleased with how they turned out.
You may be wondering how they’ll lock? I’m going to buy chain from a hardware store which will be wrapped around the boxes. That seemed the more affordable strategy vs trying to find boxes that had a lockable closing.
-
Homemade Cipher Tool

It seems to me that coming up with puzzles that result in words comes a lot easier than puzzles that result in numbers. The problem with this is that letter locks are 1) expensive, and 2) contain a limited amount of letters on each wheel. My girl’s Harry Potter escape room will have just one letter lock, and will have many number locks. Because I find word puzzles the easiest to create, using so many number locks means that I had to come up with creative ways to convert letters to numbers. My favorite of all is this little wooden homemade decipher tool.
When I tried to search for homemade cipher tools, the examples were mostly cipher wheels which consist of a circle with 26 letters around the edge, and a smaller circle inside with 26 symbols, numbers, etc around it’s edge. The students then get some clue to help them properly match the two circles, and then they can decipher from there. This is a fine design, but it’s one that I already have planned for the escape room. I wanted something different.
I saw another design in which a toilet paper tube functioned as the cipher tool, with bands of letters/numbers/symbols wrapped around the TP tube. The concept worked for me…but I really couldn’t help but think that a TP tube might detract from the magic. I decided I wanted to create a tubular cipher tool with…something from the hardware store. I essentially wanted a rod with some large beads around it that I could add letters and numbers to.
I wandered the aisles of the hardware store looking for something that could function as a bead to go around a rod.
I did not find large beads at the hardware store.
Luckily, my husband knows how to make stuff.
I bought a 1/8 inch rod and a 1.5 inch rod. I asked Saign to cut them to my specifications and to drill a 1/8 inch hole in the center of the 1.5 inch rod. He did that for me AND sanded it all to make it look nice.
I then got out a little wood burning tool and burned letters and numbers around the beads Saign had made for me. The students will need to twist the beads to spell a 4-letter word, and when they do, they’ll find what number corresponds with each letter. Using those numbers will open up the next lock for them.
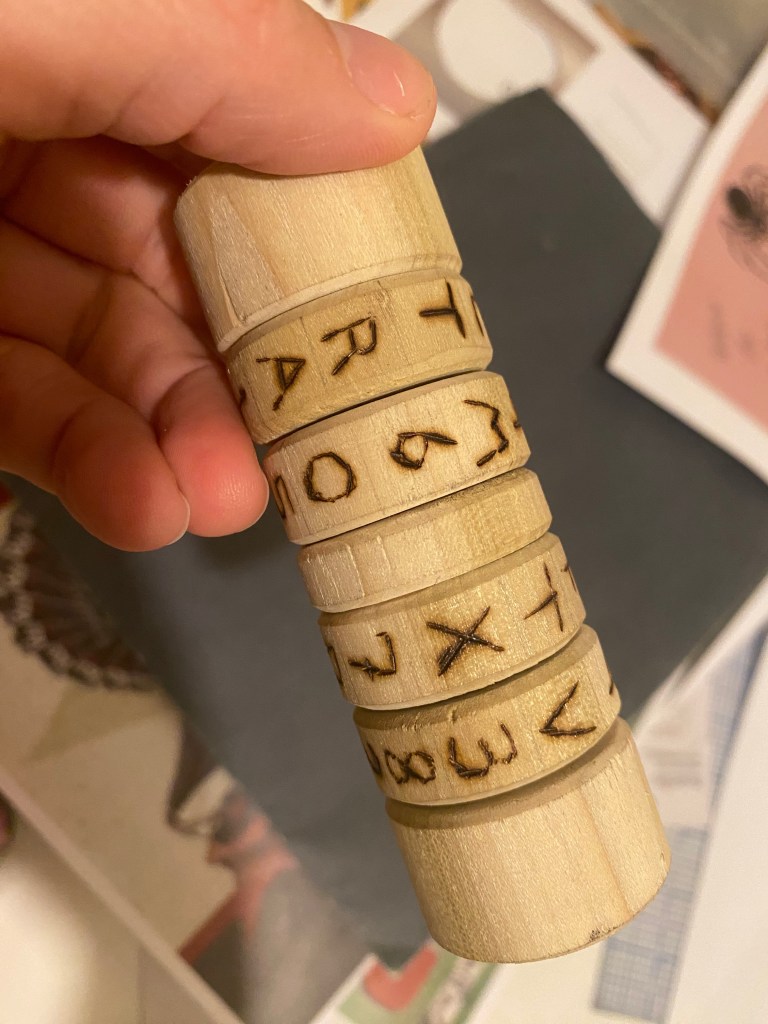
I think it turned out pretty nicely! Definitely nicer than a toilet paper tube cipher!
-
Astronomy Task

Last week, our family attended our first ever professional escape room. We went to The Escape Game in Pidgeon Forge, TN; it was great fun! It also gave me several ideas of things to add to the Harry Potter escape room that I’ve been working on. One thing that happened several times in The Escape Game was that we’d unlock a cabinet, and get a few pieces of a puzzle. Then we’d unlock another cabinet and get a few more pieces for the same puzzle. This, for some reason is quite exciting! I did add this element to the Harry Potter escape room…I may write about it another time.
I also realized that it’s pretty fun if there’s a switch involved in a task.
The problem? I’m not particularly smart when it comes to circuits, robots, etc. I KNOW they’re not that complicated…but I didn’t feel all that inspired to create anything complicated.
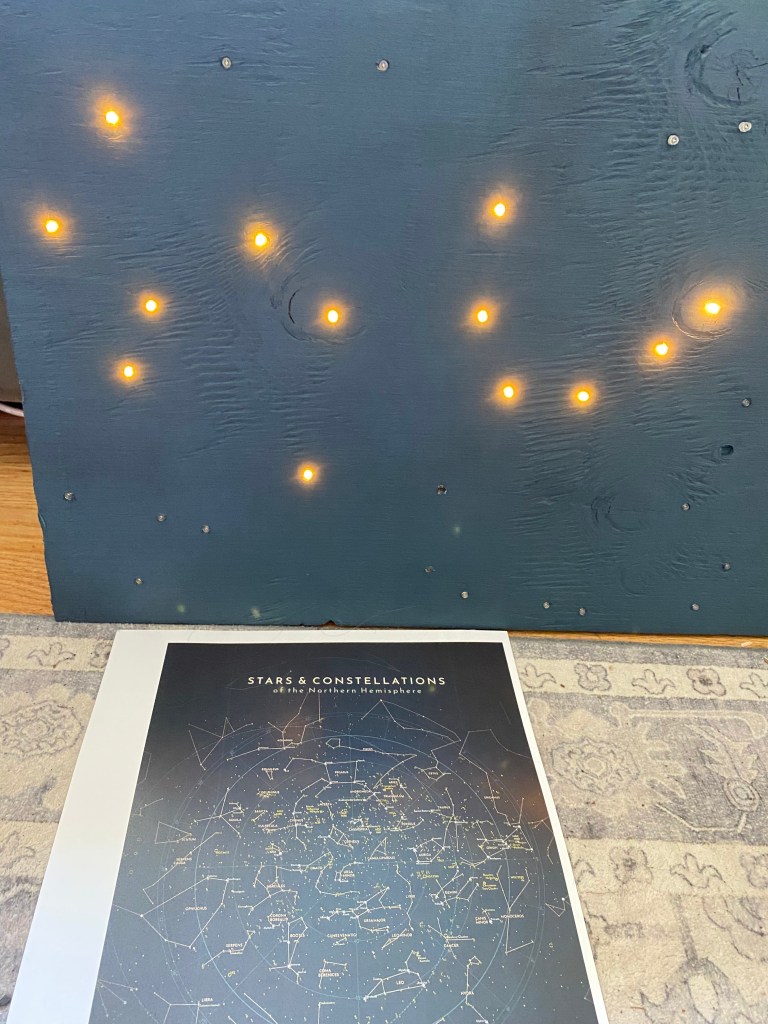
The idea that I came up with, instead, was to create a constellation task (for Astronomy Class, of course). The girls will find a board with a bunch of lights (stars) lit on it. They’ll also have a constellation map (I just found this online for free and printed it up). If they press a button, half the stars will turn off to reveal a constellation. They’ll have to identify the constellation, and doing so will help them unlock a later task.
To create this, I found a scrap piece of plywood in the garage. I drilled holes in the plywood in the shape of the constellation, and drilled extra holes as well. I used one of the battery-pack light strings and filled the holes of the constellation, and used the other string light set to fill the extra holes. I plan to leave the “other” batter pack with the switch exposed so that the girls will hopefully figure out to turn it off.
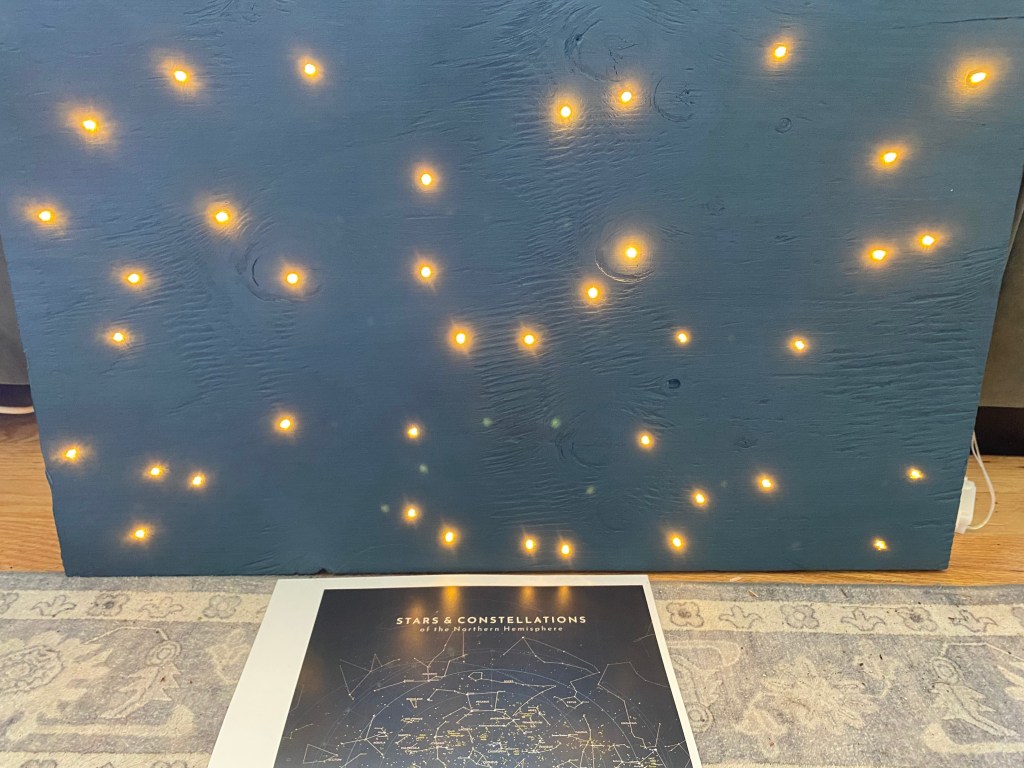
When they turn the “extra” stars off, it will reveal a constellation!
So cool, right?
Well, I thought so.
But here’s the thing: I KNOW which constellation I created and STILL had a very hard time matching it between the board and the constellation map.
Now, I am one of the least visually oriented people you will ever meet, so maybe it’s not as hard as I think?
There are also things the girls can do to help narrow down which constellation it will be. Like, they’ll know how many letters are in the name of the constellation, and they’ll know how many stars are in the constellation.
I’ve also created a mix of pretty dang difficult puzzles and much easier puzzles, so it’s okay if this is a harder one. They are allowed to ask for clues if needed.
Either way, another fun little class for the Escape Room is complete!
-
Testing out the Potions Task

For the Harry Potter Escape Room, I plan to have my “students” go through a day at Hogwarts, including attending classes. Naturally, Potions class is one of the classes they will attend.
I found an amazing Potions task on this website (Covalent Moments) in which students have to solve a logic puzzle to know which two ingredients to mix to create a potion. The color potion that the mixed liquids creates matches to a word on a list, essentially giving them a password.
I thought this idea was so so so fun. Why? Because the students are supposed to mix blue and yellow liquids and it makes….PINK! Who would ever expect that??? This seemed very magical and perfect for a Harry Potter escape room!
I did have a few issues with the task as presented on the Covalent Moments website.
First, the website said we should print out colored dots so the students know what color each potion ingredient is supposed to be. That seemed problematic to me! I didn’t want printed colored dots! I wanted properly colored potion ingredients! Printed colored dots are NOT magical!
To address the color issue, I tested things out. See, there’s sciency sciency happenings such that cabbage juice (the “blue” liquid) is a natural pH indicator, so if you add substances that change the pH balance, the cabbage juice changes unexpected colors. In the case of the Potions task, the plan is to mix cabbage juice with lemon juice and then -surprise!- it turns pink! But…the issue is that blue cabbage juice isn’t blue. It’s purple. Why? Because it’s made with purple cabbages! I’ve never seen a blue cabbage before, so I don’t know where to purchase one to make blue juice!
I did some research and learned that baking soda changes pH level as well, and will therefore turn the purple cabbage juice blue. Perfect! Blue is what I need! Buuuuuut I remember the volcano science experiment from 4th grade! I know that if I mix baking soda with lemon juice it will foam up. Now, foaming will LOOK super cool in potions class, but it’s likely to make a big ol’ mess.
I experimented with things last weekend. I followed instructions online to make a “blue” (purple) cabbage juice – 4 cabbage leaves in a blender with one cup of water. This made a purple juice. I added some baking soda. It turned a darker purple. I added more baking soda. I eventually achieved a blue color. It was a pretty intense midnight blue.
And then I experimented over the sink. I added lemon juice. It foamed over like a majestic fourth grader’s paper mache volcano.
Not exactly what I want for an escape room.
I think making the students do potions over the kitchen sink just might ruin the magical aesthetic.
At this point though, I was out of purple/blue cabbage juice, so I decided I’d have to try again another day.
Another day came today!
Since the cabbage juice and baking soda had created such a deep midnight blue, I figured watering things down might just work.
Today I did 3 cabbage leaves to 3 cups of water. This created a purple juice. I then mixed in .5 tsp baking soda. This did the trick. I had a nice blue cabbage juice!

To control for foaming, I used just half a cup of the blue cabbage juice and half a cup of lemon juice. When I mixed them, it created a beautiful bright pink potion!
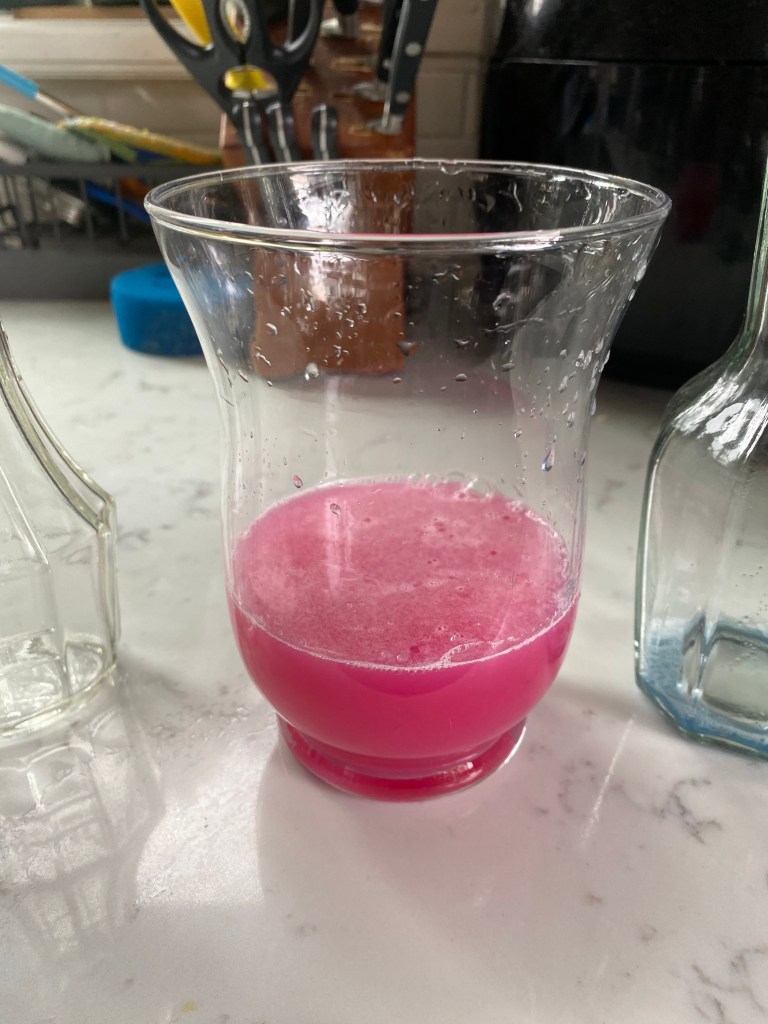
I’m so excited! I’m now confident that the potions mixing will turn out right. (I’ll probably experiment to make sure I have the ratios right on the day of the party as well).
Okay, but on to my second issue with the potions task as written by Covalent Moments.
Y’all.
I could NOT figure out the riddle the students are supposed to use to determine which two colors to mix.
Fact: I’m in my 40s and have a doctorate.
I probably SHOULD be able to solve it?
I will admit: I’ve always hated riddles. I don’t find them fun or entertaining. I HATED in elementary school when teachers or students wanted us to solve riddles. It’s possible that despite the fact I’m a grown adult with an advanced degree, I’m waaaaaay below average at riddles.
But the students at the party will be 10, so it seemed reasonable that if I couldn’t solve it (even if I am below average at riddles for an adult), it would probably be too hard for them.
So, I…destroyed the world by using Chat GPT to create a new easier riddle for them. I know, I try really hard not to use AI, but…I told you my riddle problems! There wasn’t any way I could write one myself!
And, my final issue with the potions task as written by Covalent Moments is this: The color of the resulting potion (pink) tells them which potion fits in their puzzle. Covalent Moments had a list of spells written in various colors, and the one in pink was the correct one. The problem I have? As I said, it was a list of SPELLS, not a list of POTIONS.
I know a normal person would not notice or care.
This is seriously a ridiculously cool escape room task even if the list is of spells. Buuuuuuut this is me we’re talking about, so I absolutely could not leave this as it was. I had to change the names of the spells to potions to make it match the Harry Potter theming that much better.
And now I’m getting pretty dang excited for potions class!
-
Ancient Runes

As I wrote about here, my new greatest passion is planning my kid’s Harry Potter Escape Room Birthday Party. Here is one of the puzzles I have planned, and how I went about creating the elements of the task:
Having an Ancient Runes class is pretty perfect for an escape room. Naturally, the students will have to crack the code of the ancient runes to get a code they need to unlock a locked box.
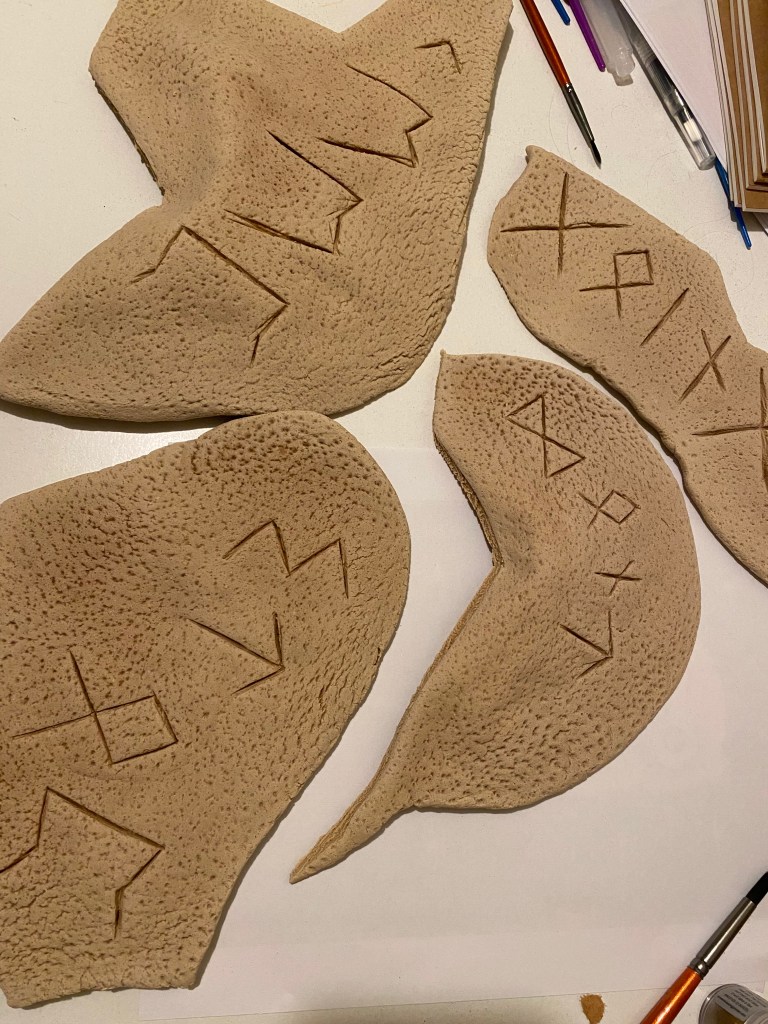
I thought it would be fun to make Ancient Runes a bit more hands-on by creating clay (e.g. salt dough) slabs on which I carved out a message to the Hogwarts students.
I wanted my daughter to have a good number of friends at her party, but in an escape room, this becomes difficult as the larger the group, the more likely that it’s hard for someone to see, or difficult to take turns. To help make sure that each guest gets to interact with the puzzles and have fun, when possible, I’ve split up the work. In the case of Ancient Runes class, I have a four word sentence the students will need to translate, and to give each party-goer a good chance of being involved with the translation, I created 4 different slabs with a single word on it. The students will be split into 4 houses, and each house will get one runes slab to work on.
I used a simple salt dough recipe, but to make it look more weathered, I added espresso powder to turn the dough more tan. Prior to carving it, I rolled the dough out and then beat it with a textured meat tenderizer. Then I rolled it a tiny bit over the top to help make the dimples look less synthetic.
I attempted to carve 4 pieces which I thought would turn into a fun little puzzle, but found that the dough pieces expanded at different rates and in different ways, and when all was said and done, the pieces did not fit together. (I was surprised by this; I thought that a dough with no baking powder, baking soda, or yeast would not expand. I was wrong).
To interpret words into runes, I went to a website in which the user types in an English word, and gives the user the same word written in runes. It was so simple!
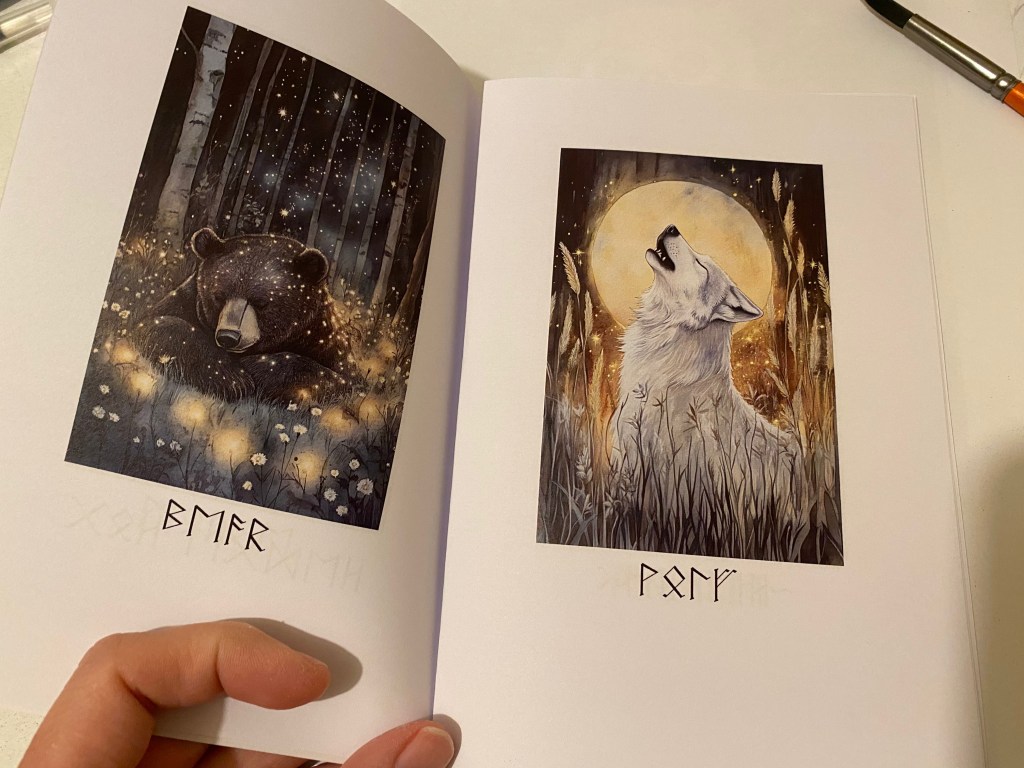
For the party-goers to learn what various runes translate to in our alphabet, I decided to go whimsical. I created an ancient runes picture book in which each page has a cute forest animal on it, and the animal named below it’s picture in ancient runes. Given that I have no artistic talent, I decided to rely on the talents of someone else. I found a seller on Etsy who makes beautiful whimsical art and sells digital copies to people like me who can’t art. The art is advertised as being for “junk journals,” and it was perfect for my purposes. For this project, I bought a “Magic Woodlands” collection which included over 100 digital paintings of cute little animals for an extremely low price.
To save money, I printed my runes picture books at the library. I wasn’t sure how the printing would turn out, and was shocked when the prints came out glossy and crisp and beautiful! In my city, each library user can print $5 worth of prints per week, at a price of 20 cents per color page. Naturally, I’m slowly printing the Escape Room papers over time so that I can print it all for free!
After printing, I traced the writing on the cover of the Ancient Runes textbooks with an embossing marker, and then used gold embossing powder to give it a fancy little texture.
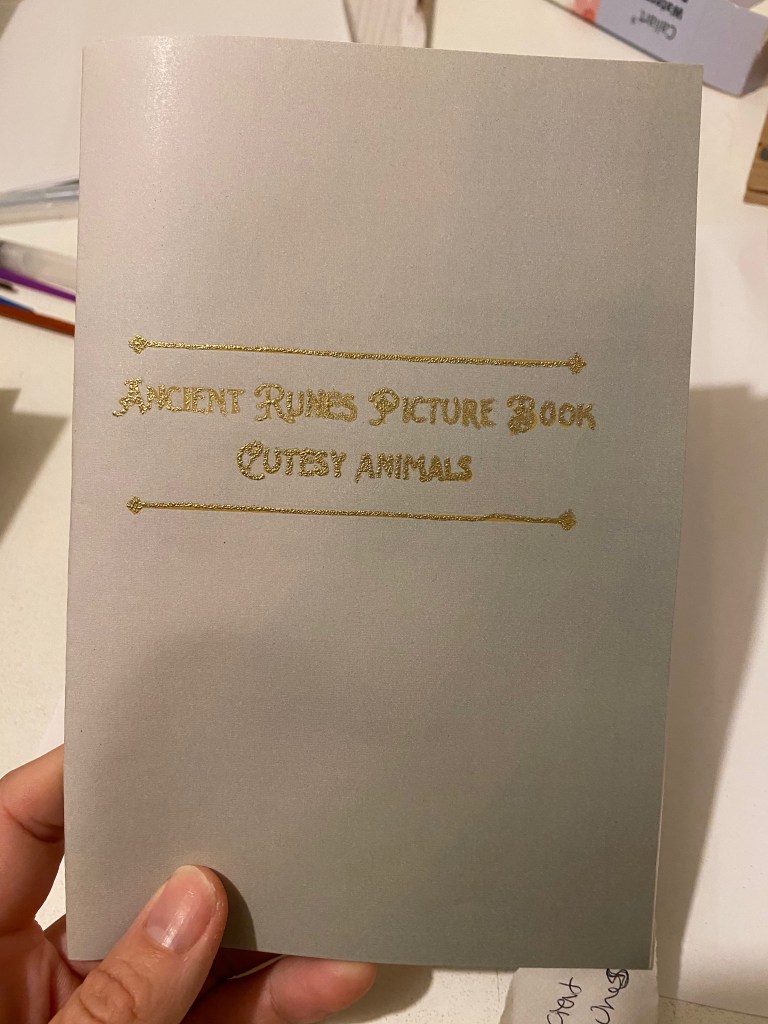
I’m so pleased with how Ancient Runes is turning out! I particularly love the Cutesy Animals Ancient Runes books! The prints are gorgeous!
-
My New Obsession

The moment I’ve been dreaming of has finally taken place.
I thought that it would never happen.
My kid is getting older, and I knew that if this day would ever come, it would have to come this year. She 9 right now, so I knew that if it didn’t happen this year, it likely wouldn’t happen at all.
And then the day I’ve dreamed of happened!
My child asked me to throw her a Harry Potter Birthday Party!!!!!!!!!!!
I COULD NOT BE MORE EXCITED.
Nothing of what I wrote above is a dramatization. I have DREAMED of throwing a Harry Potter birthday party ever since I came across a blog that used toilet paper tubes and fake tea lights to make floating candles for the Great Hall….and that was approximately 12 years ago.
But.
It gets better.
My child asked me for an ESCAPE ROOM Harry Potter Birthday Party!!!!
ARE YOU KIDDING ME????
I have absolutely thrown all of my free time into making this the most fabulous event of my life. I’ve done hours upon hours of research and planning. I am 100% sure that before the party takes place I will have put more time and effort into planning it than I did for my own wedding.
It has been so fun!
I’ve scoured the internet for ideas. I’ve dumbed ideas down to make them more appropriate for tweens. I’ve fancied up simple puzzles to make them more hands-on and fun. I had to come up with a story line to explain exactly why they must escape. (In the case of the story line I came up with, it’s more of a rescue versus an escape). I’ve had to think through things over and over and over to make sure the timing made sense and codes are being broken to align with needs of hiding items in locked boxes/areas (I wanted to take the students through a day at Hogwarts, so they must attend classes before they can go into Hogsmeade to get their Fizzing Whizzbies). I’ve written letters from various professors doing my best to take on their tone and attitudes. I’ve worked to make their day at Hogwarts whimsical, challenging, and magical.
As far as I can tell, this is the best piece of art I believe I’ll ever create. As such, I decided I must share the details along the way as I go. It’s very very very exciting!
I can’t wait to show you all the details!

-
Subscribe
Subscribed
Already have a WordPress.com account? Log in now.
